« Previous
Next »
« Previous
Next »
MICROSOFT EXCEL 2013
FORMATTING CELLS
There are various different options that can be changed to format the spreadsheets cells differently. When changing the format within cells you must select the cells that you wish to format.
To display Format Cells dialog box, select the cells you wish to change then go to
Home Tab >> Format >> Format Cells.
OR
Right click on the Cell >> Format cells
A box will appear on the screen with six different tab options. Explanations of the basic options in the format dialog box are listed below.

- Number: Allows you to set the cell type in various ways as below
- General: This is default cell format of Cell.
- Number: This displays cell as number with separator
- Currency: This displays cell as currency i.e with currency sign
- Accounting: Similar to Currency used for accounting purpose.
- Date: Various date formats are available under this.
- Time: Various Time formats are available under this.
- Percentage: This displays cell as percentage wit decimal places like 60.00%
- Fraction: This display cell as fraction like 1/4, 1/2 etc
- Scientific: This displays cell as exponential like 4.3E+01
- Text: This displays cell as normal text.
- Special: This is special formats of cell like Zip code, Phone Number
- Custom: You can use custom format by using this.
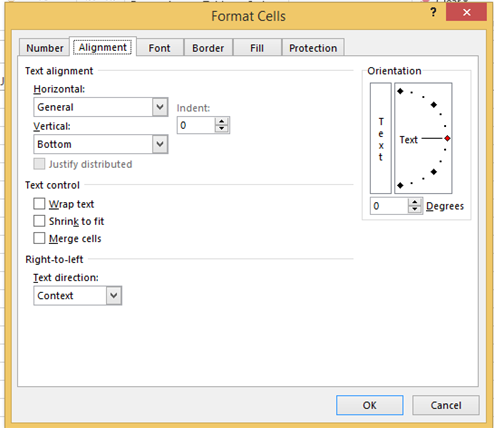
- Alignment:This allows you to change the horizontal and vertical alignment of your text within each cell. You can also change the orientation of the text within the cells and the control of the text within the cells as well.
- Horizontal Alignments
- Left: Aligns the contents of selected cell to the left side.
- Center: Centers the cell contents in the cell.
- Right: Aligns the contents of selected cell to the right side.
- Fill: Repeats the contents of the cell until the cell’s width is filled.
- Justify: Justifies the text to the left and right of the cell. This option is applicable only if the cell is formatted as wrapped text and uses more than one line.
- Vertical Alignments
- Top: Align the content of the cell to the top.
- Center: Centers the cell contents vertically in the cell.
- Bottom: Aligns the cell contents to the bottom of the cell.
- Justify: Justifies the text vertically in the cell; this option is applicable only if the cell is formatted as wrapped text and uses more than one line.
- Text Control
- Wrap text: Make all content visible in a cell and displaying with number of new lines.
- Shrint to fit: Make all content visible in a cell and it is automatically decrease and increase font size as the cell size.
- Merge cells: Merge te selected cells into one cell.
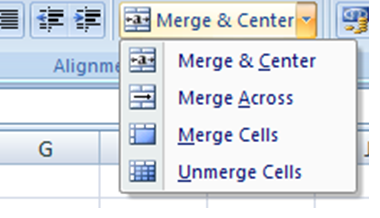
- Merge& Center: Join the selected cells into one cell and center the contents in new cell.
- Merge Across: When a multi-row range is selected, this command creates multiple merged cells-one for each row.
- Unmerge cells: Unmerges the selected cells.
- Setting Font from home: It gives the options to change the text of selected cells--
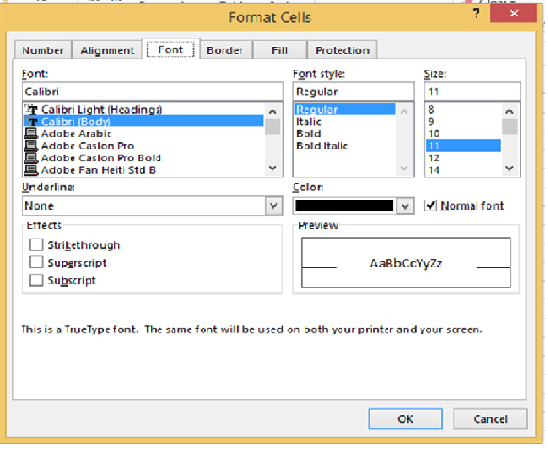
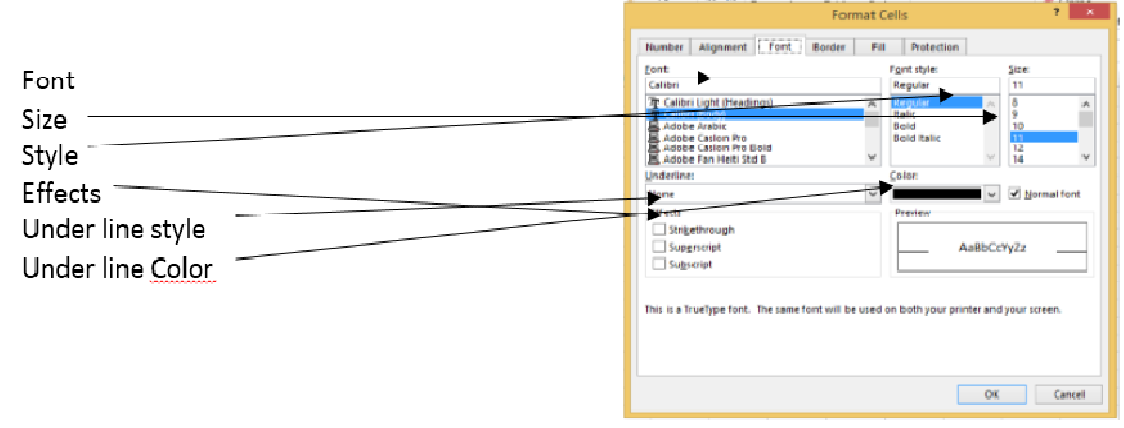
- Setting Font from format cell dialog box: It gives the options to change the selected text
Font
Size
Style
Effects
Under line style
Under line Color
 Border: Gives the option to change the design of the border around or through the cells. You can choose different command for applying and formatting border around the cells by click on border button from font group of home ribbon or by selecting border tab in format cells dialog box.


